A scoop of chocolate sorbet laid on chocolate sorbet.

FROM THE CHOCOLATE COLLECTION

Chocolate Sorbet

Chocolate Sorbet

With water, sugar, chocolate, and cocoa powder.

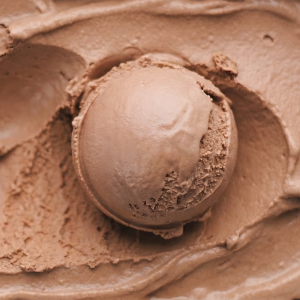
When we set off to create this chocolate sorbet recipe, we knew that we wanted it to be not too sweet, with just enough sugar to deliver the chocolate’s flavours; and loaded with the most amount of chocolate a sorbet can take. And the perfect sorbet for a dark chocolate lover.

We also wanted a smooth mouthfeel, as chocolate sorbets tend to be grainy. Upon testing, we found that blending the sorbet mixture twice; once while it is lukewarm and another time just before churning, makes for a super-smooth texture.

So now this Chocolate Sorbet has it all; it is refreshing, smooth in texture, loaded with chocolate, and perfectly balanced in terms of sweetness. Just be patient in judging its sweetness; if you test it right after churning, it will be too sweet. The right time to taste it is after it has set in the freezer when the sweetness is just right.

also available:

The ingredients

Do not reduce or replace anything; everything is there for a reason.

shows the ingredients for the chocolate sorbet recipe: water, sugar, cocoa poder, chocolate

• Chocolate/couverture: the taste of this sorbet will be as good as the taste of the chocolate (or couverture) you use, so pick one that you like. In the recipe, we use chocolate with 70-74% cocoa solids, but you can make this sorbet with any chocolate with 50-100% cocoa solids. To find out how go to the end of this page.

• Unsweetened cocoa powder: any unsweetened cocoa powder will do. Use your favourite unsweetened cocoa powder, or choose a cocoa powder judging by its aroma.

Dutch-processed cocoa is a good choice for it has a rich flavour and colour, but you can also use natural cocoa powder or raw cacao powder.

Sugar: you can use regular sugar (white granulated sugar) or a raw cane sugar such as Demerara or Turbinado, which enhances the chocolate’s flavour.

Do not use any other sugar or sweetener, natural or artificial, liquid or powder, like honey, stevia, golden syrup, table sweeteners, confectioner’s sugar, etc.

shows the ingredients for the chocolate sorbet recipe: water, sugar, cocoa poder, chocolate

• Chocolate/couverture: the taste of this sorbet will be as good as the taste of the chocolate (or couverture) you use, so pick one that you like. In the recipe, we use chocolate with 70-74% cocoa solids, but you can make this sorbet with any chocolate with 50-100% cocoa solids. To find out how go to the end of this page.

• Unsweetened cocoa powder: any unsweetened cocoa powder will do. Use your favourite unsweetened cocoa powder, or choose a cocoa powder judging by its aroma.

Dutch-processed cocoa is a good choice for it has a rich flavour and colour, but you can also use natural cocoa powder or raw cacao powder.

Sugar: you can use regular sugar (white granulated sugar) or a raw cane sugar such as Demerara or Turbinado, which enhances the chocolate’s flavour.

Do not use any other sugar or sweetener, natural or artificial, liquid or powder, like honey, stevia, golden syrup, table sweeteners, confectioner’s sugar, etc.

Overview

This is a quick overview of the recipe. Do read the recipe before proceeding. 

Bring to a boil 1 cup of the water, all the sugar and the cocoa powder, whisking to dissolve.

Pour the cocoa mixture into the melted chocolate, whisking to combine.

Blend with an immersion blender until smoth.

Chill until fridge-cold over an ice bath.

(a no ice bath method is also included in the recipe)

Add the rest of the fridge-cold water; stir well. 

Now it is cold and ready to churn. Blend one more time to ensure a smooth texture.

Churn in your ice cream maker until fluffed up and steady.

Put it in the freezer for a few hours to set. 

As soon as it sets, you can either serve it from the ice cream maker bowl or transfer it to a container and store it in the freezer.

The recipe

Chocolate Sorbet

Chocolate Sorbet

Ingredients:
Notes:

We recommend to weigh with a kitchen scale the all the ingredients, even the liquid ones.

If you do not have a kitchen scale, follow these guidelines:

• 1 cup (US) = 237 ml | 1 tablespoon = 15 ml

• sugar: measuring sugar in tablespoons is more accurate than measuring it in cups. Use a 15 ml measuring tablespoon (not a regular one); this is 13 gr of sugar. To measure correctly, each time you scoop the sugar, level it with the flat side of a knife.

• chocolate/couverture: measuring chocolate in cups is not possible because measurements vary depending on how finely chopped the chocolate is. Instead, you can estimate the number of chocolate pieces you need based on the weight of the chocolate bar as written on the packaging.

Note that the quantities in each measuring system (grams, ounces, and cups) in our recipes may not always be accurate conversions; any deviations in conversions you may notice do not affect the outcome.

This recipe makes a 1.2 litre/quart of sorbet mixture (before churning), perfect for ice cream makers with a capacity of 1.5 and up to 2 litres/quarts (like Cuisinart ice cream makers).

If you need to scale the sorbet mixture up or down, use this ratio of the ingredients (in weight only): 

water 70% / sugar 17.3 % / chocolate 70-74% cocoa solids 11.1% / cocoa powder 1.6% 

in desired total weight of sorbet mixture.

For example, if you want to make 1000 g (approx. 1 litre) of sorbet mixture, you need:

• 1000 g x 70% = 700 g water

• 1000 g x 17.3% = 173 g sugar

• 1000 g x 11.1% = 111 g chocolate 70-74%

• 1000 g x 1.6% = 16 g cocoa powder

A flexible rubber spatula is good for:
-wiping the bottom of the saucepan when you cook the cocoa mixture on the stovetop.
-scraping residues from bowls, saucepans etc.

If you do not have one, we strongly encourage you to buy one, preferably a flexible one. 

Instructions
Plan ahead:

If your ice cream maker has a removable freezer bowl, put it in the freezer for the whole time indicated by the manufacturer before churning, usually 24 hours.

Step 1: Make the sorbet mixture

Place a rubber spatula and a whisk on a plate next to the stovetop to have them ready to use interchangeably.

Melt the chocolate: put the chopped chocolate in a large heatproof bowl. Place the bowl over a pan with simmering water; the bottom of the bowl should not touch the water. Stir the chocolate with a rubber spatula to melt it. Remove the bowl with the melted chocolate from the saucepan, wipe its bottom dry and set aside.

Dissolve the sugar: in a medium saucepan, put 240 g of the water (8.5 oz; 1 cup) and all the sugar. Bring to a boil over medium heat, stirring to dissolve the sugar.

Add the cocoa powder (20 g; 0.7 oz) when all the sugar dissolves. Increase the heat to medium-high, whisking constantly. When the first bubbles appear on the surface, remove the saucepan from the heat.

Cool it down: add 240 g of fridge-cold water (8.5 oz; 1 cup), whisking to combine.

Pour the cocoa mixture into the melted chocolate a little at a time, whisking to combine.

Stir with the rubber spatula, wiping the sides and the bottom of the bowl to remove any chocolate residues.

Blend with an immersion blender until smooth, and no brown clumps are visible on the sides when you tilt the bowl.

Step 2: Cool completely

This step will have the sorbet mixture fridge-cold and ready for churning in 30 minutes; you need plenty of ice cubes for this. Alternatively, you can chill it overnight in the fridge: to do so, follow the instructions on the “No ice cubes? No problem” at the end of this step.

Strain the sorbet mixture over a fine-mesh sieve and into a bowl. Hint: choose a bowl made of heatproof glass or stainless steel; these chill the sorbet mixture faster. Note that a plastic bowl takes longer to cool, while a regular glass bowl may break upon contact with the ice bath.

Let the sorbet mixture cool in the water bath for 20-30 minutes, occasionally stirring, until it is cold to the touch (this is below 12°C / 54° F if you have a thermometer). Refresh the ice bath with ice cubes as they melt to keep it super-cold. You will need about 350 g / 12 oz of ice cubes.

Remove the bowl from the ice bath and wipe its bottom dry with a kitchen towel.

Add the rest of the fridge-cold water (370 g; 13 oz; 1½ cup and 20 ml) and whisk/stir until smooth. The sorbet mixture is cold and ready to churn. If you do not churn it immediatelly, cover and refrigerate for up to 3 days.

If you do not have enough ice cubes, you can chill the sorbet mixture in the refrigerator overnight – or until it is completely cold. To do so:

Add the rest of the fridge-cold water (370 g; 13.1 oz; 1½ cup and 20 ml) into the lukewarm cocoa mixture and stir thoroughly to combine. 

Chill until completely cold: cover the bowl and refrigerate for at least 8 hours and up to 3 days.

When churning with a domestic ice cream maker, the sorbet mixture must be fridge-cold (feels fridge-cold to the touch / if you have a thermometer below 12ºC / 54ºF ).

If the sorbet mixture is not cold enough, the ice cream maker may not be able to churn it to its fullest potential, resulting in a sloppy liquid vs. fluffy sorbet.

Step 3: Churn the sorbet

Check if the sorbet mixture is cold before churning it: (it feels fridge-cold to the touch / below 12ºC / 54ºF).

Prepare the ice cream maker according to the manufacturer’s instructions. 

Blend the sorbet mixture with the immersion blender for 30 seconds to ensure a smooth texture.

Churn: with the machine running, pour the sorbet mixture through the canister and into the ice cream makerLeave to churn until fluffed up and steady; depending on your ice cream maker, this can take anywhere from 30-60 minutes.

This sorbet will expand and fluff up during churning. It is ready when it is fluffy. The total churning time depends on your ice cream maker and could be anywhere from 30-70 minutes.

To evaluate if it is ready, lift a spoonful; it should be thick enough to stand on the spoon, but it will still be soft. If it looks watery or starts to melt the moment you spoon it, leave it to churn for longer.

In any case, if you feel doubts about the consistency, leave it to churn for ten minutes more. But beware: at this stage, do not expect it to be like store-bought sorbet; for now, it will be softer. It will firm up and become like store-bought sorbet only after it sets in the freezer. So, stop the ice cream maker when the sorbet is steady and fluffy, as described above.

Note that some ice cream makers are programmed to stop after a specific time, which doesn’t make sense because the sorbet may need to churn for more to reach its fullest potential. So, if you notice that your ice cream maker stops on its own and upon checking the sorbet, you find that it is sloppy instead of fluffy, try to turn the machine on again and leave it to churn until it reaches the desired texture.

Step 4: Put the sorbet in the freezer to set

Put in the freezer to set: before serving the sorbet or moving it to a container for storing, you have to put it in the freezer to set. To do so, turn off the ice cream maker and: 

· remove the removable freezer bowl (still filled with the sorbet) from the ice cream machine
· remove the paddle, scraping any sorbet attached to it back into the ice cream bowl 
· cover the ice cream bowl and place it in the freezer 
Setting time should take an hour or so, see notes below for indicative times.

Serve or store: when it sets, you can serve it directly from the removable freezer bowl or transfer it to an airtight container for longer storage.

The setting time for the sorbet largely depends on the type of ice cream maker you use.

It can take :

  • 1-3 hours for removable freezer bowls (these are the ice cream maker bowls which you should pre-freeze before churning)
  • 1 hour for aluminium bowls (these are the bowls from compressor ice cream makers)

Note: the times given are indicative. Setting time depends on many factors.

Check it occasionally (approx. every 1 hour; or as needed) while it is in the freezer. The sorbet is ready when it has an internal temperature of about -10ºC / 14ºF. If you do not have a thermometer, to evaluate if the sorbet has set, insert a round tip knife into it, all the way to the bottom: 

  • when the sorbet is ready, it feels firm as you go down, but at the same time it is soft enough to insert the knife into it; it should have this same firm consistency from top to bottom.
  • not ready yet: it will feel hard on the top and softer as you go down
  • if left in the freezer for too long: it will be too hard for the knife to insert into it and too hard to scoop out of the ice cream bowl. Do not worry, though! Read right below how to soften it.

If the sorbet stays in the removable freezer bowl for too long, it will harden and be difficult to remove or serve.

To make it scoopable again, leave it in the refrigerator to soften. That can take:

  • anywhere from 4 to 10 hours for removable freezer bowls (the ones which need pre-freezing before churning)
  • 1-2 hours for aluminium bowls (these are the bowls from compressor ice cream makers)

(Note: the time given is indicative, time may vary depending on many factors, so do check it occasionally as it sits in the refrigerator.)

When the sorbet is easy to scoop (or it has an internal temperature of approx. -10°C / 14°F if you have a thermometer), you can transfer it to another container and store it in the freezer or serve it directly from the removable freezer bowl.

Straight after churning, the sorbet has a soft consistency and melts immediately upon contact with anything. This makes it impossible to serve or transfer to another container.

Putting it in the freezer after churning sets it and brings it to the right consistency, similar to that of a store-bought one.

Storing and serving

Storing: in the freezer for six months, covered well.

Scooping: this sorbet, like all artisanal sorbets, freezes hard in the long term. You can make it scoopable by putting it in the refrigerator for 45-60 minutes until soft; or until its internal temperature reads -8°C / 18°F.

Instructions

If your ice cream maker has a removable freezer bowl, put it in the freezer for the whole time indicated by the manufacturer before churning, usually 24 hours.

Place a rubber spatula and a whisk on a plate next to the stovetop to have them ready to use interchangeably.

Melt the chocolate: put the chocolate in a large heatproof bowl. Place the bowl over a pan with simmering water; the bottom of the bowl should not touch the water. Stir the chocolate with a rubber spatula to melt it. Remove the bowl with the melted chocolate from the saucepan, wipe its bottom dry and set aside.

Dissolve the sugar: in a medium saucepan, put 240 g of the water (8.5 oz; 1 cup) and all the sugar. Bring to a boil over medium heat, stirring to dissolve the sugar.

Add the cocoa powder (20 g; 0.7 oz) when all the sugar dissolves. Increase the heat to medium-high, whisking constantly. When the first bubbles appear on the surface, remove the saucepan from the heat.

Cool it down: add 240 g of fridge-cold water (8.5 oz; 1 cup), whisking to combine.

Pour the cocoa mixture into the melted chocolate a little at a time, whisking to combine.

Stir with the rubber spatula, wiping the sides and the bottom of the bowl to remove any chocolate residues.

Blend with an immersion blender until smooth, and no brown clumps are visible on the sides when you tilt the bowl.

This step will have the sorbet mixture fridge-cold and ready for churning in 30 minutes; you need plenty of ice cubes for this. Alternatively, you can chill it overnight in the fridge: to do so, follow the instructions on the “No ice cubes? No problemin the questions & troubleshooting section below.

Strain the sorbet mixture over a fine-mesh sieve and into a bowl. Hint: choose a bowl made of heatproof glass or stainless steel; these chill the sorbet mixture faster. Note that a plastic bowl takes longer to cool, while a regular glass bowl may break upon contact with the ice bath.

Let the sorbet mixture cool in the water bath for 20-30 minutes, occasionally stirring, until it is cold to the touch (this is below 12°C / 54° F if you have a thermometer). Refresh the ice bath with ice cubes as they melt to keep it super-cold. You will need about 350 g / 12 oz of ice cubes.

Remove the bowl from the ice bath and wipe its bottom dry with a kitchen towel.

Add the rest of the fridge-cold water (370 g; 13 oz; 1½ cup and 20 ml) and whisk/stir until smooth.

Check if the sorbet mixture is cold before churning it: 4ºC–12ºC / 39ºF-54ºF / it feels fridge-cold when you place your finger into it.

Prepare the ice cream maker according to the manufacturer’s instructions. 

Blend the sorbet mixture with the immersion blender for 30 seconds to ensure a smooth texture.

Churn: with the machine running, pour the sorbet mixture through the canister and into the ice cream makerLeave to churn until fluffed up and steady; depending on your ice cream maker, this can take anywhere from 30-60 minutes. Read more in How do I know when the sorbet is ready in questions & troubleshooting below.

Put in the freezer to set: before serving the sorbet or moving it to a container for storing, you have to put it in the freezer to set. To do so, turn off the ice cream maker and: 

· remove the removable freezer bowl (still filled with the sorbet) from the ice cream machine
· remove the paddle, scraping any sorbet attached to it back into the ice cream bowl 
· cover the ice cream bowl and place it in the freezer 
Setting time takes an hour or so; also read How long does it take for the sorbet to set in the questions & troubleshooting section below. 

Serve or store: when it sets, you can serve it directly from the removable freezer bowl or transfer it to an airtight container for longer storage.

Storing: in the freezer for six months, covered well.

Scooping: this sorbet, like all artisanal sorbets, freezes hard in the long term. You can make it scoopable by putting it in the refrigerator for 45-60 minutes until soft; or until its internal temperature reads -8°C / 18°F.

If you do not have enough ice cubes, you can chill the sorbet mixture in the refrigerator overnight – or until it is completely cold. To do so:

Add the rest of the fridge-cold water (370 g; 13.1 oz; 1½ cup and 20 ml) into the lukewarm cocoa mixture and stir thoroughly to combine. 

Chill until completely cold: cover the bowl and refrigerate for at least 8 hours and up to 3 days.

When churning with a domestic ice cream maker, the sorbet mixture must be fridge-cold (4ºC–12ºC / 39ºF-54ºF / it feels fridge-cold to the touch).

If the sorbet mixture is not cold enough, the ice cream maker may not be able to churn it to its fullest potential, resulting in a sloppy liquid vs. fluffy sorbet.

This ice cream will expand and fluff up during churning. It is ready when it looks smooth and fluffy, with the consistency of soft-serve ice cream. The total churning time depends on your ice cream maker and could be anywhere from 30-70 minutes.

To evaluate if it is ready, lift a spoonful; it should be thick enough to stand on the spoon, but it will still be soft like soft-serve ice cream. If it looks watery or starts to melt the moment you spoon it, leave it to churn for longer.

In any case, if you feel doubts about the consistency, leave it to churn for ten minutes more. But beware: at this stage, do not expect it to be like store-bought carton ice cream; for now, it should be more like soft-serve ice cream.

It will firm up and become like store-bought ice cream only after it sets in the freezer.

So, stop the ice cream maker when thick and creamy, as described above. If you leave to churn it for much longer, it will start turning grainy.

Warning: some ice cream makers are programmed to stop after a specific time, which doesn’t make sense because the ice cream may need to churn for more to reach its fullest potential. So, if you notice that your ice cream maker stops on its own and upon checking the ice cream, you find that it is sloppy instead of fluffy, try to turn the machine on again and leave it to churn until it reaches the desired texture.

The setting time for the sorbet largely depends on the type of ice cream maker you use.

It can take :

  • 1-3 hours for removable freezer bowls (these are the ice cream maker bowls which you should pre-freeze before churning)
  • 1 hour for aluminium bowls (these are the bowls from compressor ice cream makers)

Note: the times given are indicative. Setting time depends on many factors.

Check it occasionally (approx. every 1 hour; or as needed) while it is in the freezer. The sorbet is ready when it has an internal temperature of about -10ºC / 14ºF. If you do not have a thermometer, to evaluate if the sorbet has set, insert a round tip knife into it, all the way to the bottom: 

  • when the sorbet is ready, it feels firm as you go down, but at the same time it is soft enough to insert the knife into it; it should have this same firm consistency from top to bottom.
  • not ready yet: it will feel hard on the top and softer as you go down
  • if left in the freezer for too long: it will be too hard for the knife to insert into it and too hard to scoop out of the ice cream bowl. Do not worry, though! Read right below how to soften it.

If the sorbet stays in the removable freezer bowl for too long, it will harden and be difficult to remove or serve.

To make it scoopable again, leave it in the refrigerator to soften. That can take:

  • anywhere from 4 to 10 hours for removable freezer bowls (the ones which need pre-freezing before churning)
  • 1-2 hours for aluminium bowls (these are the bowls from compressor ice cream makers)

(Note: the time given is indicative, time may vary depending on many factors, so do check it occasionally as it sits in the refrigerator.)

When the sorbet is easy to scoop (or it has an internal temperature of approx. -10°C / 14°F if you have a thermometer), you can transfer it to another container and store it in the freezer or serve it directly from the removable freezer bowl.

Straight after churning, the sorbet has a soft consistency and melts immediately upon contact with anything. This makes it impossible to serve or transfer to another container.

Putting it in the freezer after churning sets it and brings it to the right consistency, similar to that of a store-bought one.

Make this ice cream with any cocoa solids % chocolate/couverture!
Make this ice cream with any cocoa solids % chocolate!

Click on the cocoa solids % chocolate of your chocolate to see how much chocolate & sugar you need for the recipe:

Scroll right to find the cocoa solids % chocolate of your choice and see how much chocolate and sugar you need:

• 200 g (7.1 oz) chocolate 50-54% 

• 155 g sugar (5.5 oz; 12 Tbsp.)

• 175 g (6.2 oz) chocolate 55-59% 

• 175 g sugar (6.2 oz; 13.5 Tbsp.)

• 160 g (5.6 oz) chocolate 60-64% 

• 190 g sugar (6.7 oz; 14.5 Tbsp.)

• 150 g (5.3 oz) chocolate 65-69% 

• 200 g sugar (7.1 oz; 15 Tbsp.)

• 135 g (4.8 oz) chocolate 70-74% 

• 210 g sugar (7.4 oz; 16 Tbsp.)

• 125 g (4.4 oz) chocolate 75-79% 

• 220 g sugar (7.8 oz; 17 Tbsp.)

• 115 g (4.1 oz) chocolate 80-84%

• 225 g sugar (7.9 oz; 17 Tbsp.)

• 105 g (3.7 oz) chocolate 85-89% 

• 235 g sugar (8.3 oz; 18 Tbsp.)

• 100 g (3.5 oz) chocolate 90-94% 

• 240 sugar (8.5 oz; 18 Tbsp.)

• 95 g (3.4 oz) chocolate 95-100% 

• 245 sugar (8.6 oz; 19 Tbsp.)

How to use it: 

1. Find out how much cocoa solids your chocolate contains (it is written on its packaging) 

2. Click above on the cocoa solids% of your chocolate (or scroll to find it if using a mobile/tablet)

3. Take a note of how much chocolate and sugar you need, and 

4. Use that much in the recipe.

The quantities of the other ingredients (water and cooca powder) remain the same.

More sorbets to love:

3 Responses

  1. Do you think I can add a bit of xantham gum for better consistency and texture? If so, how much?

    1. Yes, you can. I would start with 3/4 teaspoon and the decide from there if I want less or more next time. 🙂

      1. Thank you so much for the quick response! I’ll definitely give this a try.

Leave a Reply

Your email address will not be published. Required fields are marked *

This site uses Akismet to reduce spam. Learn how your comment data is processed.