
SORBETS – THE RIGHT WAY
With Damson plums, water and sugar
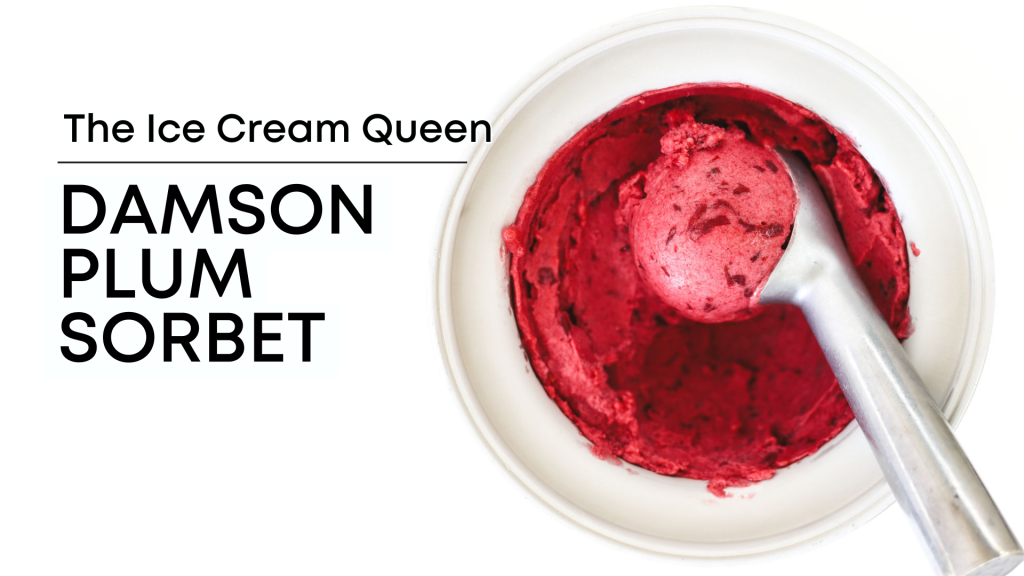
If you’re a fan of Damson plums, this sorbet is a must-try. Damson plums are in season in October and are a real treat for any fruit lover. Their flavour becomes more intense and aromatic when cooked, making for an irresistible sorbet.
This recipe cooks the plums with sugar on the stove until they soften and their flavour deepens. With only two ingredients — plums and sugar — it’s simple yet delicious, and with a few carefully developed tricks, the sorbet achieves a smooth, velvety texture that keeps in the freezer for weeks.
The biggest challenge when developing this recipe was the plum’s tough skin. After some trial and error, two solutions emerged: the first is to cut the plums into tiny pieces before cooking them; the second is to let the plums macerate in sugar overnight, which softens their skins. For a super-smooth finish, you can do both.
or see:
Do not reduce or replace anything; everything is there for a reason.

• Damson plums: it’s preferable to use larger fruit over smaller ones. The tough skins of Damson plums are not easy to soften, so larger fruit with more pulp than skin is ideal. Look for ripe plums that feel soft and firm. Alternatively, you can use other plum varieties to make this sorbet.
• Sugar: use regular sugar (white granulated sugar).
Do not use any other sugar or sweetener, natural or artificial, liquid or powder, like honey, stevia, golden syrup, table sweeteners, confectioner’s sugar, etc.
• Water, drinkable (not shown in the picture).
This recipe makes a 1.2 litre/quart sorbet mixture (before churning), perfect for ice cream makers with a capacity of 1.5 and up to 2 litres/quarts (like Cuisinart ice cream makers).
If you need to scale the sorbet mixture up or down, use this ratio of the ingredients (in weight only):
Damson plums 83,4% / sugar 16.6%
in desired total weight of sorbet mixture.
for example, if you want to make 1000 g (approx. 1 litre) of sorbet mixture, you need:
• 1000 g x 83.4% = 834 g Damson plums
• 1000 g x 16.6% = 166 g sugar
The secret to this perfectly smooth sorbet is the quantity of the sugar. Although we prefer our sorbets on the less sweet side, the sugar in this sorbet contributes to its perfectly smooth texture and prevents the formation of ice crystals.
Using that much sugar also means that the sorbet melts fast during serving. So if you are making it when the weather is hot, you may want to reduce the sugar by 30 g; 1 oz, but expect it to become a little bit icier in the freezer.
Another way to make the sorbet taste less sweet is to replace part of the sugar with glucose syrup (you can replace up to 50g of sugar with 50 g of glucose syrup; equal quantities in weight) and still have this perfect texture. Just make sure to add the glucose syrup in the saucepan before you cook the Damson plums.
A flexible rubber spatula is good for:
-wiping the bottom of the saucepan when you cook on the stovetop to prevent scalding.
-scraping residues from bowls, saucepans etc.
If you do not have one, we strongly encourage you to buy one, preferably a flexible one.
The sorbet mixture should be completely cold before churning, so prepare it in advance to give it time to chill in the refrigerator.
If your ice cream maker has a removable freezer bowl, put it in the freezer for the whole time indicated by the manufacturer before churning, usually 24 hours.
This step is about making the tough fruit’s skin in the sorbet as fine as possible. There are three ways to do so, you can choose any you like:
Put the plums and the sugar into a large saucepan (if using the overnight method, scrape off with a rubber spatula all the syrup and any undissolved sugar left on the bowl into the saucepan).
Weigh the saucepan and its containers over a kitchen scale and keep a note of the total weight.
Cook until the sugar dissolves: place over medium-high heat and cook, stirring occasionally with a rubber spatula.
Cook to soften the plums: when all the sugar dissolves, increase the heat to high, cover the saucepan with a lid, leaving a small gap open at the edges and cook until the plums soften. This should take:
Remove from the heat and leave it to cool down, about one hour.
Weigh the saucepan and add enough water to reach the initial total weight (see your note).
Blend, starting with the chunks: remove the plums chunks with a slotted spoon into a blender and blend until smooth and the skins are as fine as possible -stop the blender once and scrape the sides and bottom of the blender with a rubber spatula-.
Add the syrup: with the blender on, slowly add the syrup left in the saucepan, scraping along all residues from the saucepan with a rubber spatula. Blend to combine.
When churning with a domestic ice cream maker, the sorbet mixture must be fridge-cold (feels fridge-cold to the touch / if you have a thermometer below 12ºC / 54ºF ).
If the sorbet mixture is not cold enough, the ice cream maker may not be able to churn it to its fullest potential, resulting in a sloppy liquid vs. fluffy sorbet.
Pour the sorbet mixture into a bowl, scraping all residues from the saucepan.
Put in the refrigerator until completely cold, about 8 hours, and up to 1 day.
Check if the sorbet mixture is cold before churning it: (it feels fridge-cold to the touch / below 12ºC / 54ºF).
Prepare the ice cream maker according to the manufacturer’s instructions.
Stir: with a rubber spatula give the sorbet mixture a nice, thorough stir.
Churn: with the machine running, pour the sorbet mixture through the canister and into the ice cream maker. Leave to churn until fluffed up and steady; depending on your ice cream maker, this can take anywhere from 40-70 minutes.
This sorbet will expand and fluff up during churning. It is ready when it is fluffy. The total churning time depends on your ice cream maker and could be anywhere from 40-70 minutes.
To evaluate if it is ready, lift a spoonful; it should be thick enough to stand on the spoon, but it will still be soft. If it looks watery or starts to melt the moment you spoon it, leave it to churn for longer.
In any case, if you feel doubts about the consistency, leave it to churn for ten minutes more. But beware: at this stage, do not expect it to be like store-bought sorbet; for now, it will be softer. It will firm up only after it sets in the freezer. So, stop the ice cream maker when the sorbet is steady and fluffy, as described above.
Note that some ice cream makers are programmed to stop after a specific time, which doesn’t make sense because the sorbet may need to churn for more to reach its fullest potential. So, if you notice that your ice cream maker stops on its own and upon checking the sorbet, you find that it is sloppy instead of fluffy, try to turn the machine on again and leave it to churn until it reaches the desired texture.
Put in the freezer to set: before serving the sorbet or moving it to a container for storing, you have to put it in the freezer to set. To do so, turn off the ice cream maker and:
· remove the removable freezer bowl (still filled with the ice cream) from the ice cream machine
· remove the paddle, scraping any sorbet attached to it back into the ice cream bowl
· place it in the freezer, uncovered.
Setting time depends on many factors; see notes below for indicative times.
Serve or store: when it sets, you can serve it directly from the removable freezer bowl or transfer it to an airtight container for longer storage.
The setting time for the sorbet largely depends on the type of ice cream maker you use.
It can take :
Note: the times given are indicative. Setting time depends on many factors.
When the sorbet is ready, it feels firm as you insert a knife into it; it should have this same firm consistency from top to bottom. Else:
If the sorbet stays in the removable freezer bowl for too long, it will harden and be difficult to remove or serve.
To make it scoopable again, leave it in the refrigerator to soften. That can take:
(Note: the time given is indicative, time may vary depending on many factors, so do check it occasionally as it sits in the refrigerator.)
When the sorbet is easy to scoop you can transfer it to another container and store it in the freezer or serve it directly from the removable freezer bowl.
Straight after churning, the sorbet has a soft consistency and melts immediately upon contact with anything. This makes it impossible to serve or transfer to another container.
Putting it in the freezer after churning sets it and brings it to the right consistency, similar to that of a store-bought one.
Storing: in the freezer for three months, covered well.
Scooping: this sorbet, like all artisanal sorbets, it freezes hard in the long term. You can make it scoopable by putting it in the refrigerator for 30-60 minutes.
Your privacy settings
Manage Consent Preferences
Necessary
Analytics
Embedded Videos
Marketing
Facebook Advanced Matching
Facebook CAPI
